Hey Ozi, sorry for the late reply - always happy to share process techniques

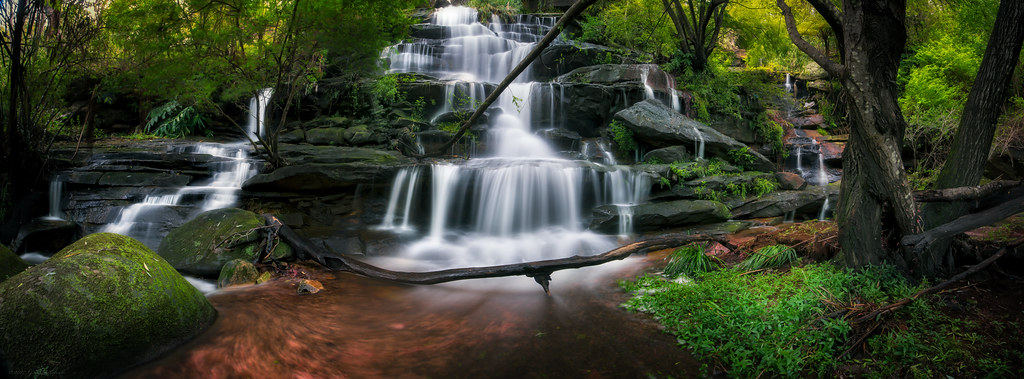
ozimax wrote:Both are un-bloomin-believable. In regards to the first, would it have been even better without the branches in the foreground? Not sure about this. They do provide another focal point of interest in an already magical scene..
I did consider trying to move these, but time was short and they were probably too heavy

ozimax wrote:Gerry you wouldn't mind sharing the process for this image? I'd be interested to learn.
The waterfall shot is panorama image, from memory it would be about 5 horizontal shots at 16mm, shutter 13 seconds (except the left two images they where 25 seconds from memory, this part of the scene had much more in the shadows) and aperture f13, this gives about a 180 degree FOV coverage. The stitched images are single shots, ie not bracketed, the lightiing as pretty perfect on the day, overcast and fairly diffused. The shots where taken on my lightweight pano rail, this is pretty important since the focal length is so wide and the scene complex with lots of near and far objects making parrallax error a big issue. Filters used were a screw-in CPL and screw-in 3 stop ND.
The processing consists of stitching in
PS which was easy given the shots are taken on the rail about the lens nodal point. The processing following this consists of:
1) adjustment of the colour balance to correct the polariser and ND filter I basically reduce the blue and red channel thus taking the cast away and also giving the greens a bit more love.
2) Adjust shadows - levels and curves for this, or d-lighting basically even out the light over the scene.
3) Locally bright and desaturate some parts, particularly the water, the water in this is case more a sewerage colour yellow

hence I smacked it's saturation to hide it and give it more of nicer look

4) Add diffusion (locally) I use either a orton effect style in
PS, new layer -> Gaussian blur (5ish) + high contrast (80%) and small brightness (20%) increase and blend layer at about 30% opacity. new layer -> filter->other-> high pass apply this at about 4 ish, just enough to see some detail, blend this layer at 100% using soft light.
What the above does is create a nice glow which you can locally brush onto all or parts of the image, in this case I applied it to the entire image. You can also use presets in some programs to create the same effect. Note the high pass filter keeps things nice and sharp but still keeps that glow.
5) some local clarity on the rocks and tree trunks to give them some punch to stand out.
6) basic light room adjustments (i have a standard preset I use) like reduce blacks a bit, increase contrast, reduce haze, increase sharpness, reduce noise - thats all pretty minimal
7) I pushed the warmth (locally up the top) a bit more just to give those trees up the top behind everything else more natural/nicer look. I often also (for waterfall scenes) reduce the blues, I am not big on that blueish colour water


radial filter to reduce image edge brightness (i also include slight desaturation on this as well) or vignetting - I typically apply this than paint some areas in or out as desired. This step does two things, the vignette obviously tunnels the vision to the centre, but the desaturation also helps remove the eyes from this area and throw them into the other parts where the colour is more prominent..
Hope this helps - it may sound like a lot but not really

happy to expand on any of the points and I can show the editing steps and the effect on the image if you like


 (C) 2017 Gerard Blacklock, all rights reserved by Gerard Blacklock, on Flickr
 (C) 2017 Gerard Blacklock, all rights reserved by Gerard Blacklock, on Flickr
 (C) 2017 Gerard Blacklock, all rights reserved by Gerard Blacklock, on Flickr
 (C) 2017 Gerard Blacklock, all rights reserved by Gerard Blacklock, on Flickr
